Recording Electric Guitar – The Best Way to Record a Guitar Amp with Shure SM57 & More
How many microphones should I use?
As always, there are no general rules for that matter. Professional audio engineers often tend to use several mics on the guitar cabinet. The secret behind this is clear: Every mic has a unique sound. By blending several microphones you can catch different sounds and aspects of the cabinet and blend them together to get something bigger. That’s why some sophisticated experts use dozens of mics on different cabs, with different speakers, amps etc. etc. But let’s not get crazy here. To start, it’s perfectly fine to use just one mic and refine your technique with the best setup you can afford.Recording electric guitar is an art form
It usually takes a lot of time to discover how a guitar recording with real mics works and where is a myriad of variables you may discover affecting the sound. Recording electric guitar cabinets is an art form which every audio engineer has to master. It usually takes years to refine your technique to get something really unique. Of course you can use a nifty short cut like using Impulse Responses with a load box on your amp or with an amp simulation plug-in like S-Gear for example. I don’t wanna dig deeper into this right here because it’s off topic. But if this sounds interesting to you, you can have a look at my comparison between real cabinets & Impulse Responses here: Impulse Responses vs Real Cabinet.Recording Electric Guitar with One Mic
Pros:
- Quick and simple setup: Only one track required for recording.
Cons:
- Limited flexibility: The sound cannot be altered during mixing.
- Potential need for re-recording: If the initial results are unsatisfactory, reamping or starting over might be necessary.
Recording Electric Guitar with Several Mics
Pros:
- Versatile sound options: Utilize different microphones, cabinets, and amplifiers for a wide range of sounds.
- Strength and weakness balance: Each mic’s unique characteristics can be used to enhance the overall sound.
- Enhanced mix flexibility: Offers more sound design options and versatility in the mixing stage.
- Rich and layered audio: Layering multiple mics can create unique and rich sound textures.
Cons:
- Increased setup and post-production time: Requires more effort in both the recording and editing phases.
- Potential for phase issues: Using multiple mics increases the likelihood of phase alignment challenges and run-time differences.
Mic Placement – The holy grail of Electric Guitar Recording setups
After you’ve decided how many and what mics you want to use you are faced with the most important question: How should I place them. Mic placement is crucial for recording electric guitar. With the usual guitar amp mics like the Shure SM57 or Sennheiser MD421 you get big sound differences even if you move the mic just a millimeter.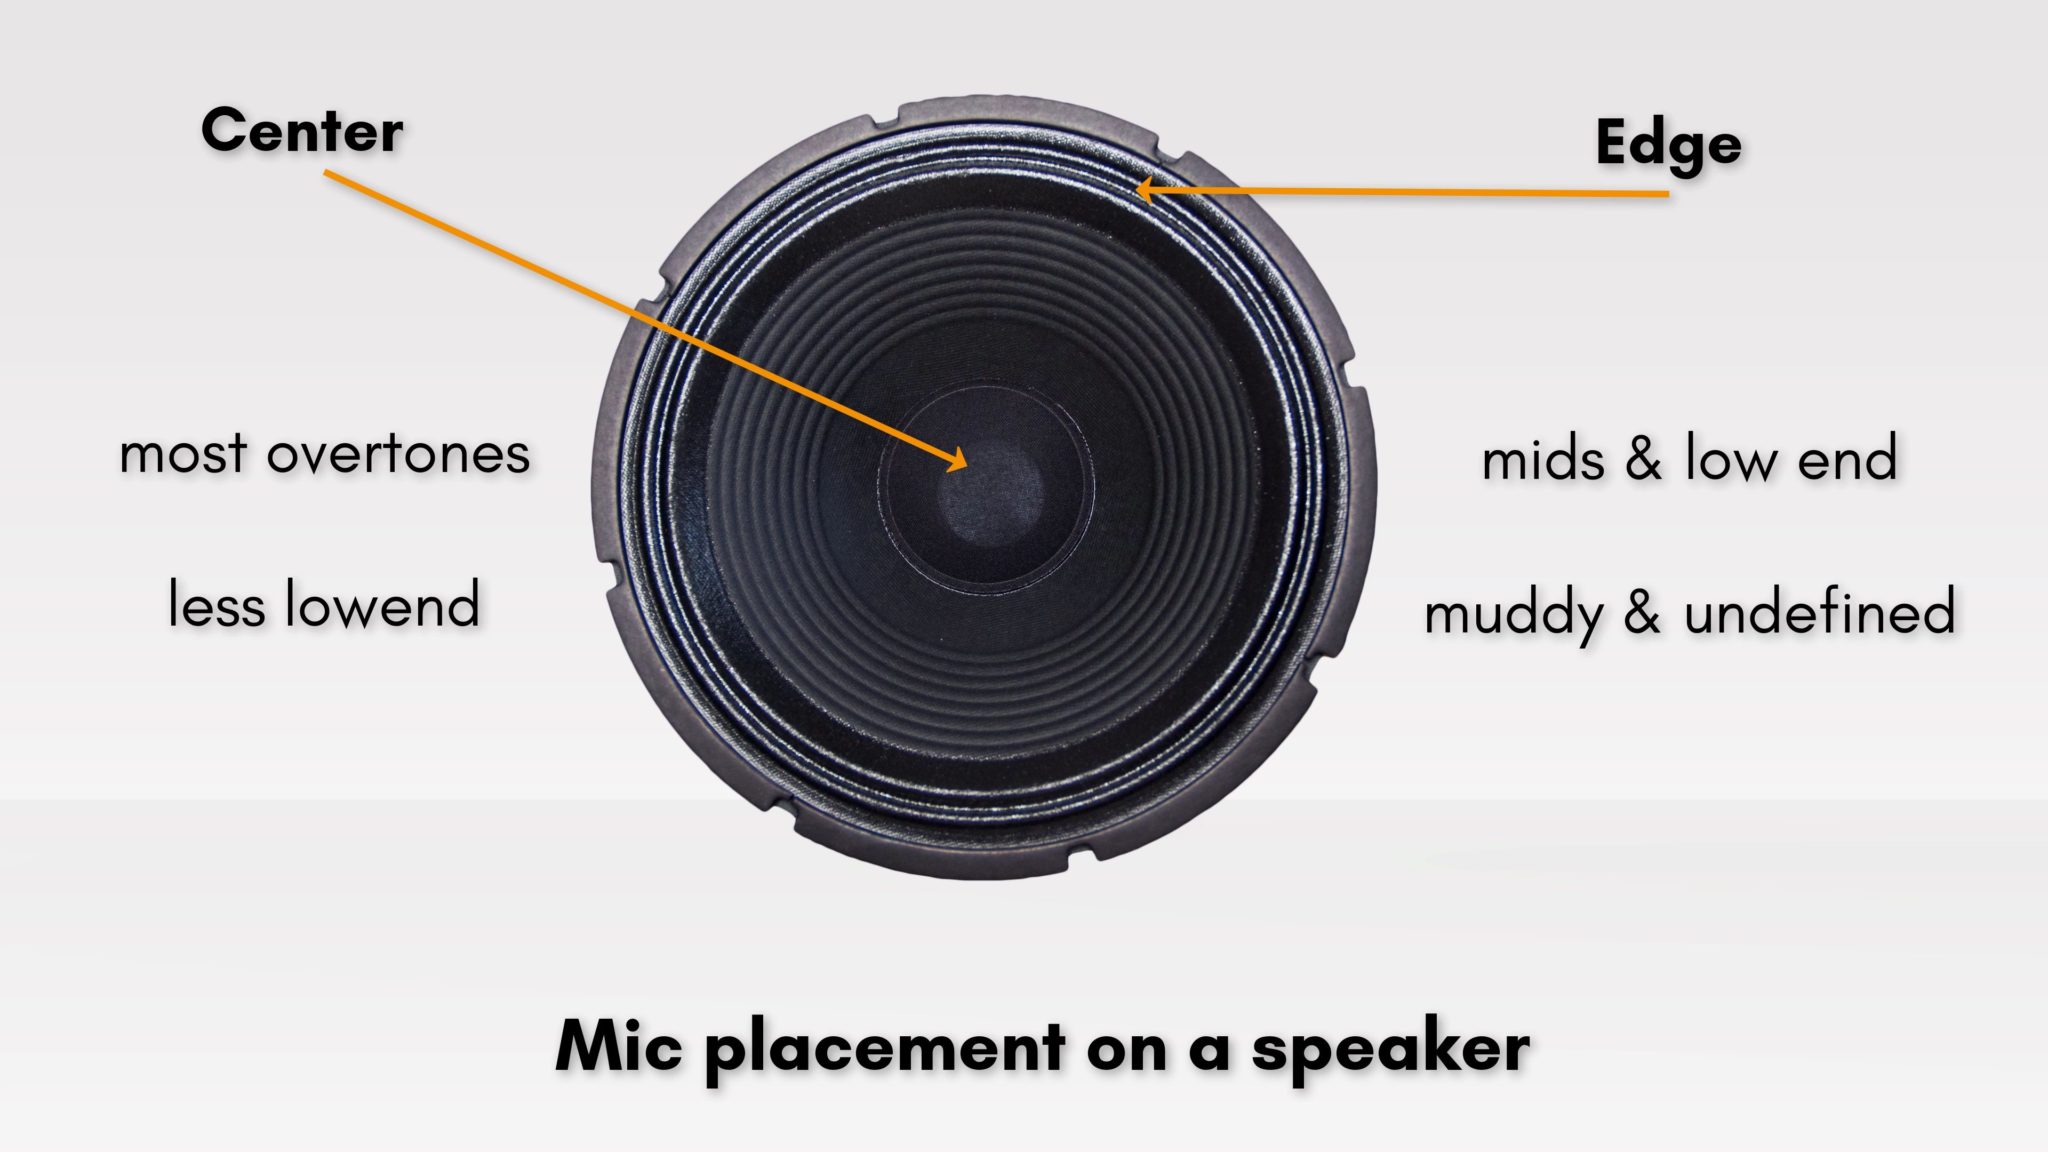
The center of the cone usually sounds aggressive and rich in overtones. This gradually declines if you move toward the edge.
Dark Mic / Bright Mic Technique
If you are using only one mic you have to find the perfect sweet spot between the aggressive overtones in the center and the low end of the edge. It can take some time to find the right settings. A common technique for several mics is the dark mic / bright mic technique. Instead of concentrating on finding the one and only sweet spot you can deliberately use one or several mics near to the center for the high end and another one (or several) in outer positions for the low end. By combining these together during the mixing process you can get a fast variety of different blends and you can change the sounds even if your mix is almost finished. I can tell you from my years of experience as an audio engineer that I often change the balance of my guitar mics even in the last minute to make it fit better into the mix.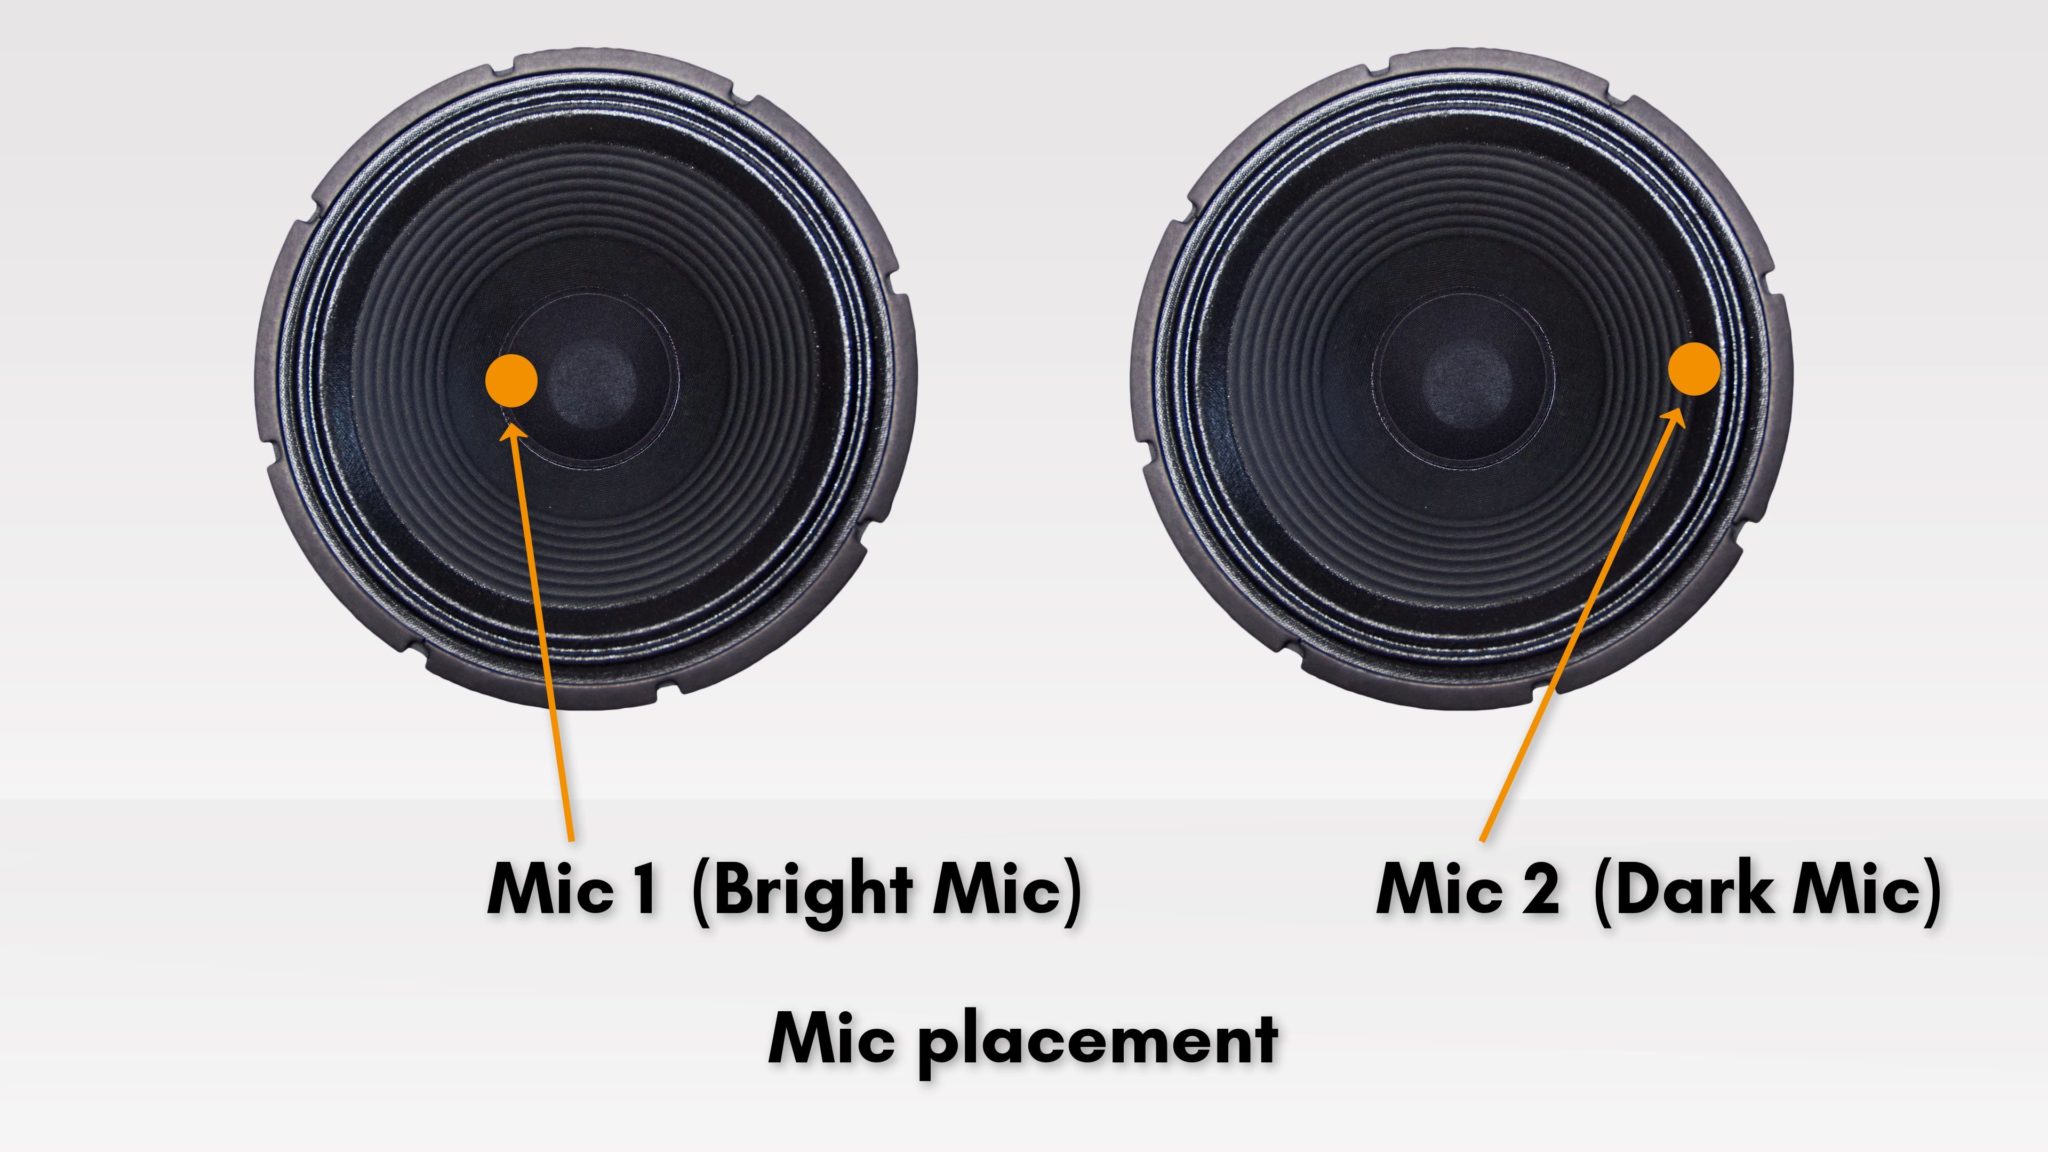
Using the Bright Mic / Dark Mic technique you can blend your guitar tone even in the final mix.
Recording Electric Guitar with different mic angles
Changing the angle of the mic can help you to get even more sound variety. If you aim the microphone capsule to the center of the cone and change the angle you’ll notice that the sound gets less bright & less annoying (in some cases) but also has a great deal of low end. This really helps to get a good balance. Using different mic angles (0° & 45°) with two SM57s is also what the so-called “Fredman Technique” (used for the “In Flames” sound) is about. I will show you how to do this particular sound in a future tutorial. Stay tuned ;-).
A certain angle reduces the brightness of the tone. It also enable even more sound variety.
Guitar speakers are sensitive creatures
Most guitar cabinet simulations in modern plug-ins still fail to make an exact representation of the speakers. Guitar speakers are a much more complex and dynamic system that most people would imagine. For example: because of the shape of the cone you get different sweet spots where frequencies either tone down or sum up. Furthermore, there is a big spread between different speakers of the same type. If you have a 4×12 cabinet it usually has 4 times the same speaker type loaded. But surprisingly if you compare how each of them sounds you’ll notice that the sound differs significantly. And we are only talking about the speakers so far. We haven’t even talked about the acoustics of the cabinet and how different woods and form factors (slanted / straight) change the sound. It’s extremely hard (though not impossible) to emulate that with a mathematical algorithm. Impulse Responses are different in that regards as they don’t use an algorithm, they are a snapshot on how a real speaker reacts to the guitar signal.Good speaker combinations for solid guitar tone
As you might have noticed: There’s an almost infinite number of choices and combinations to get to your guitar tone. As usual you will also need some time to discover and sharpen your hearing skills to know what sound you prefer the most. One of the most famous and iconic speakers for modern rock sounds is the Celestion Vintage V30. It’s very popular among metal & rock guitarist.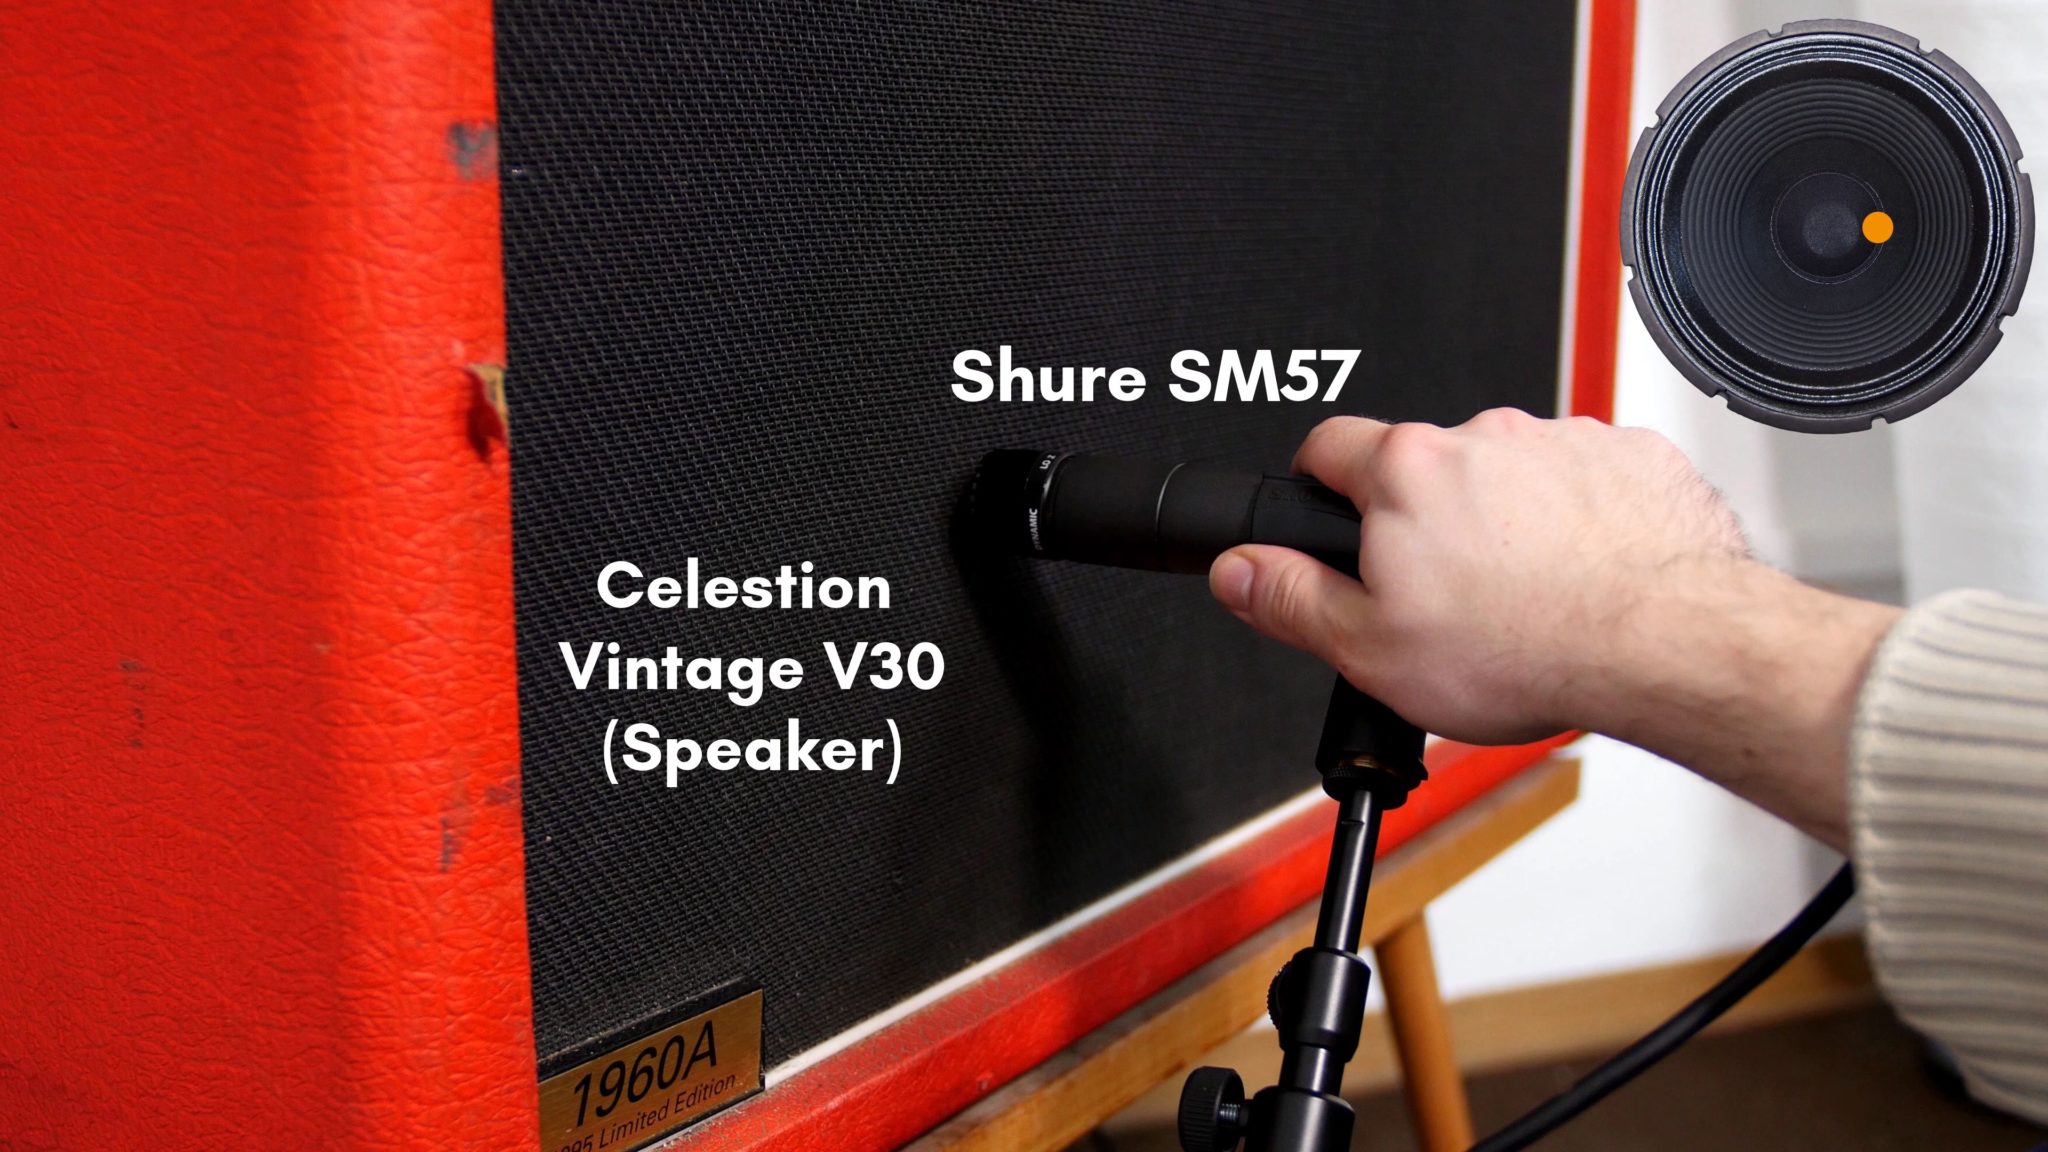
The iconic Shure SM57 on a Celestion Vintage V30 is probably the most common speaker / mic combination in modern recording history.
How I Achieve My Guitar Sound
In this tutorial I’ve used a Marshall 1960A cabinet with both Vintage V30s and Celestion G12-T75s recorded with a Shure SM57 (the most iconic guitar amp mic of all time) and a much darker sounding Shure SM7B (often used for radio/broadcasting). I tend to place my dark mic a little further away from the speaker to let the low frequencies spread out accordingly before they are picked up by the mic. This usually results in phase issues and the so-called comb filter effect. But as you already know we are phase alignment expoerts;-). Here’s a video on how to deal with these phase issues on guitar: Phase Alignment for Guitars .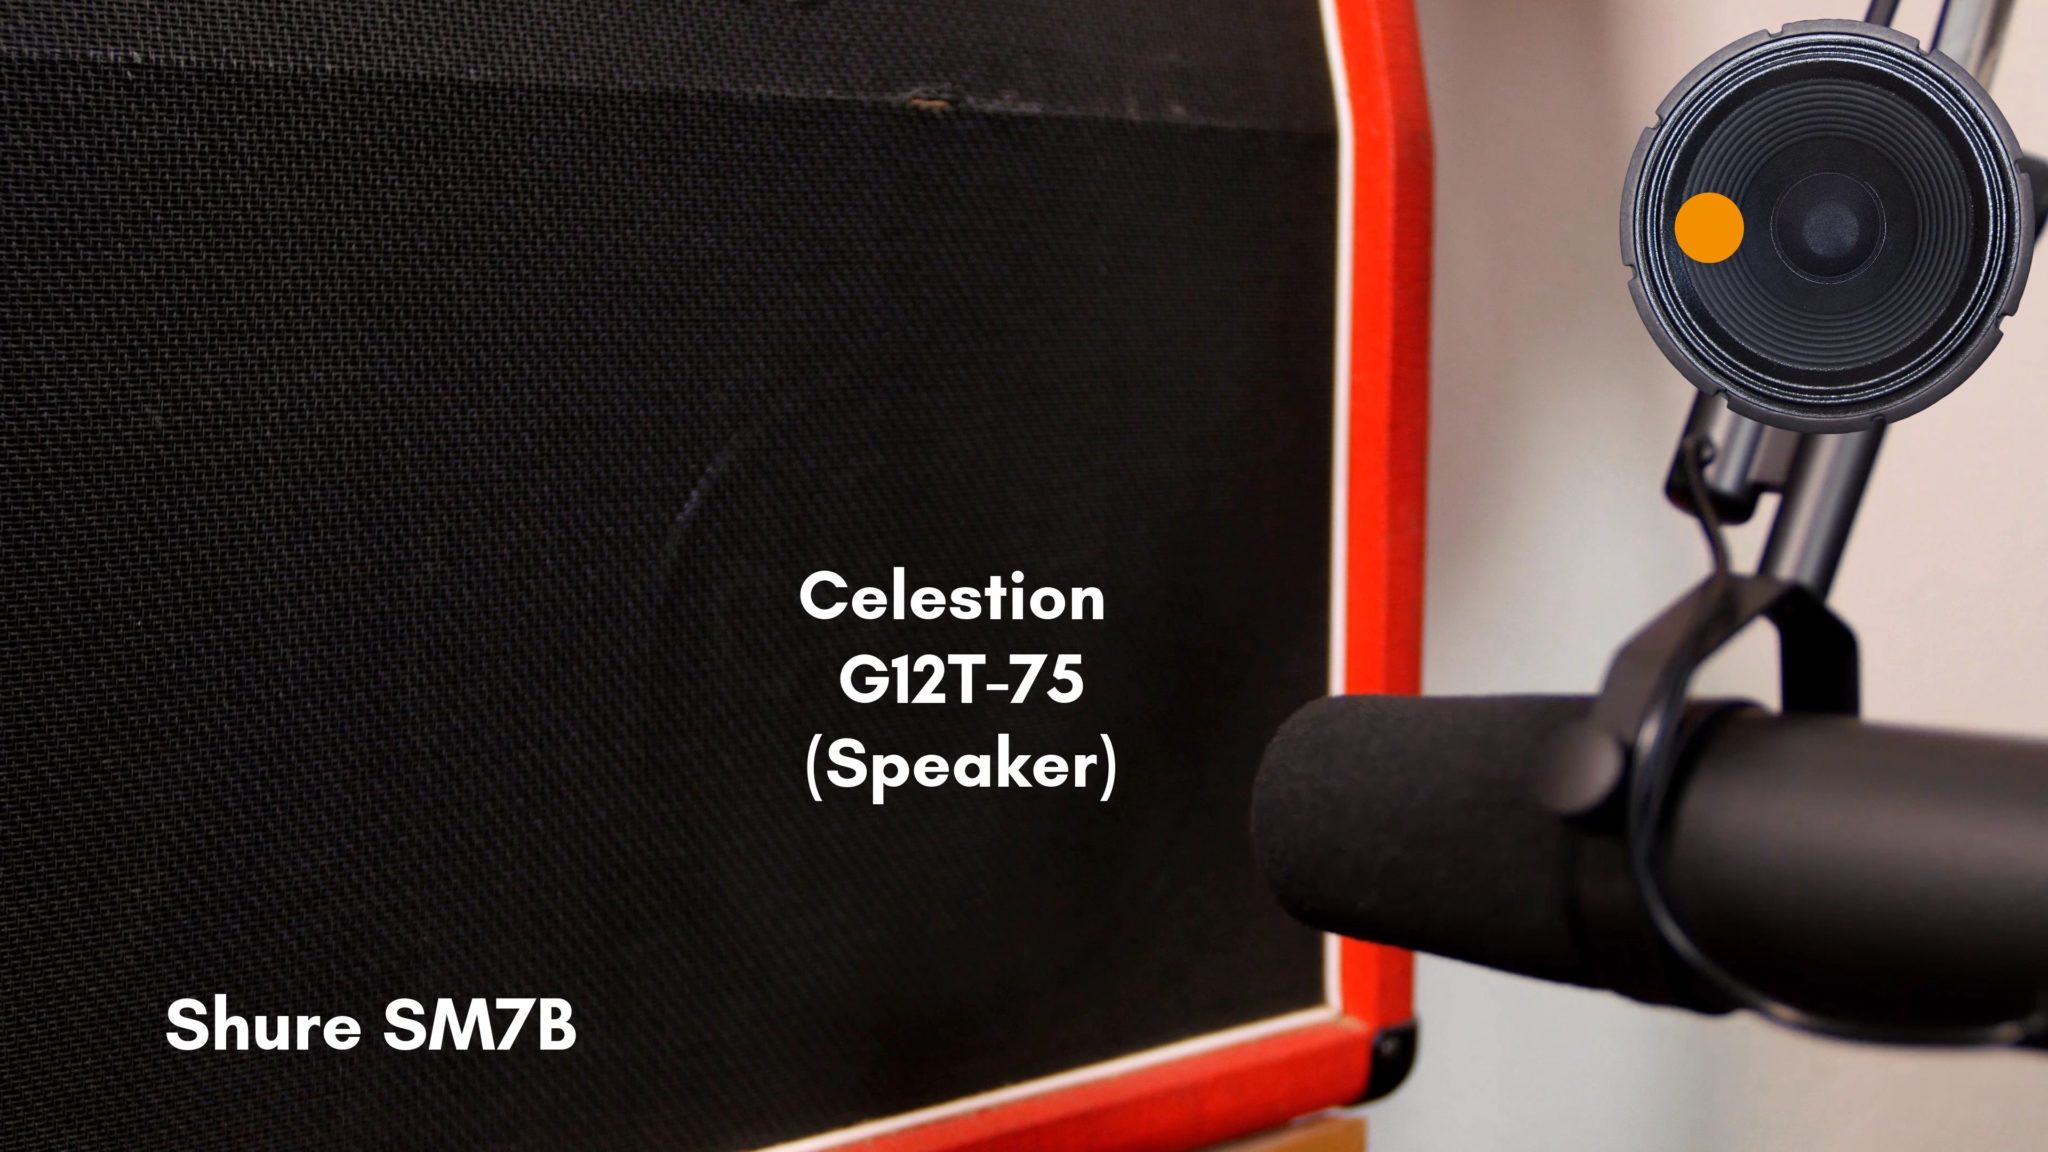
The Celestion G12-T75 is a formidable rock guitar speaker. Not as bright as the V30 but still punchy. The SM7B is great as a dark mic. It has a much larger diaphragm as the Shure SM57 and covers much low end.
Using the DI signal to spice things up
When recording electric guitar, it’s always a good idea to record the DI track, the dry signal coming directly from your guitar. It is often used as a safety net in case you are not satisfied with your guitar recording and therefore you can reamp your signal with the help of a reamping box later. But you can also use the DI signal to spice up your recording, especially if it’s a clean or crunchy sound. The reason why it can be beneficial is easy: The DI signal usually has a better attack and fresh transients. Every part of your recording chain: cables, pedals, the amp, cabinet and the mics tend to grind down and reduce transients. That’s not bad per se as it makes the sound warmer, too. But this is the exciting stuff: If you combine the dry signal, which sounds boring and not colorful on its own, with your mics you can preserve the transients and get a fresh & nice blend sound. As with the different mics you also have to be aware that there are time / phase differences between the DI and the mics and these have to be compensated properly (see video above).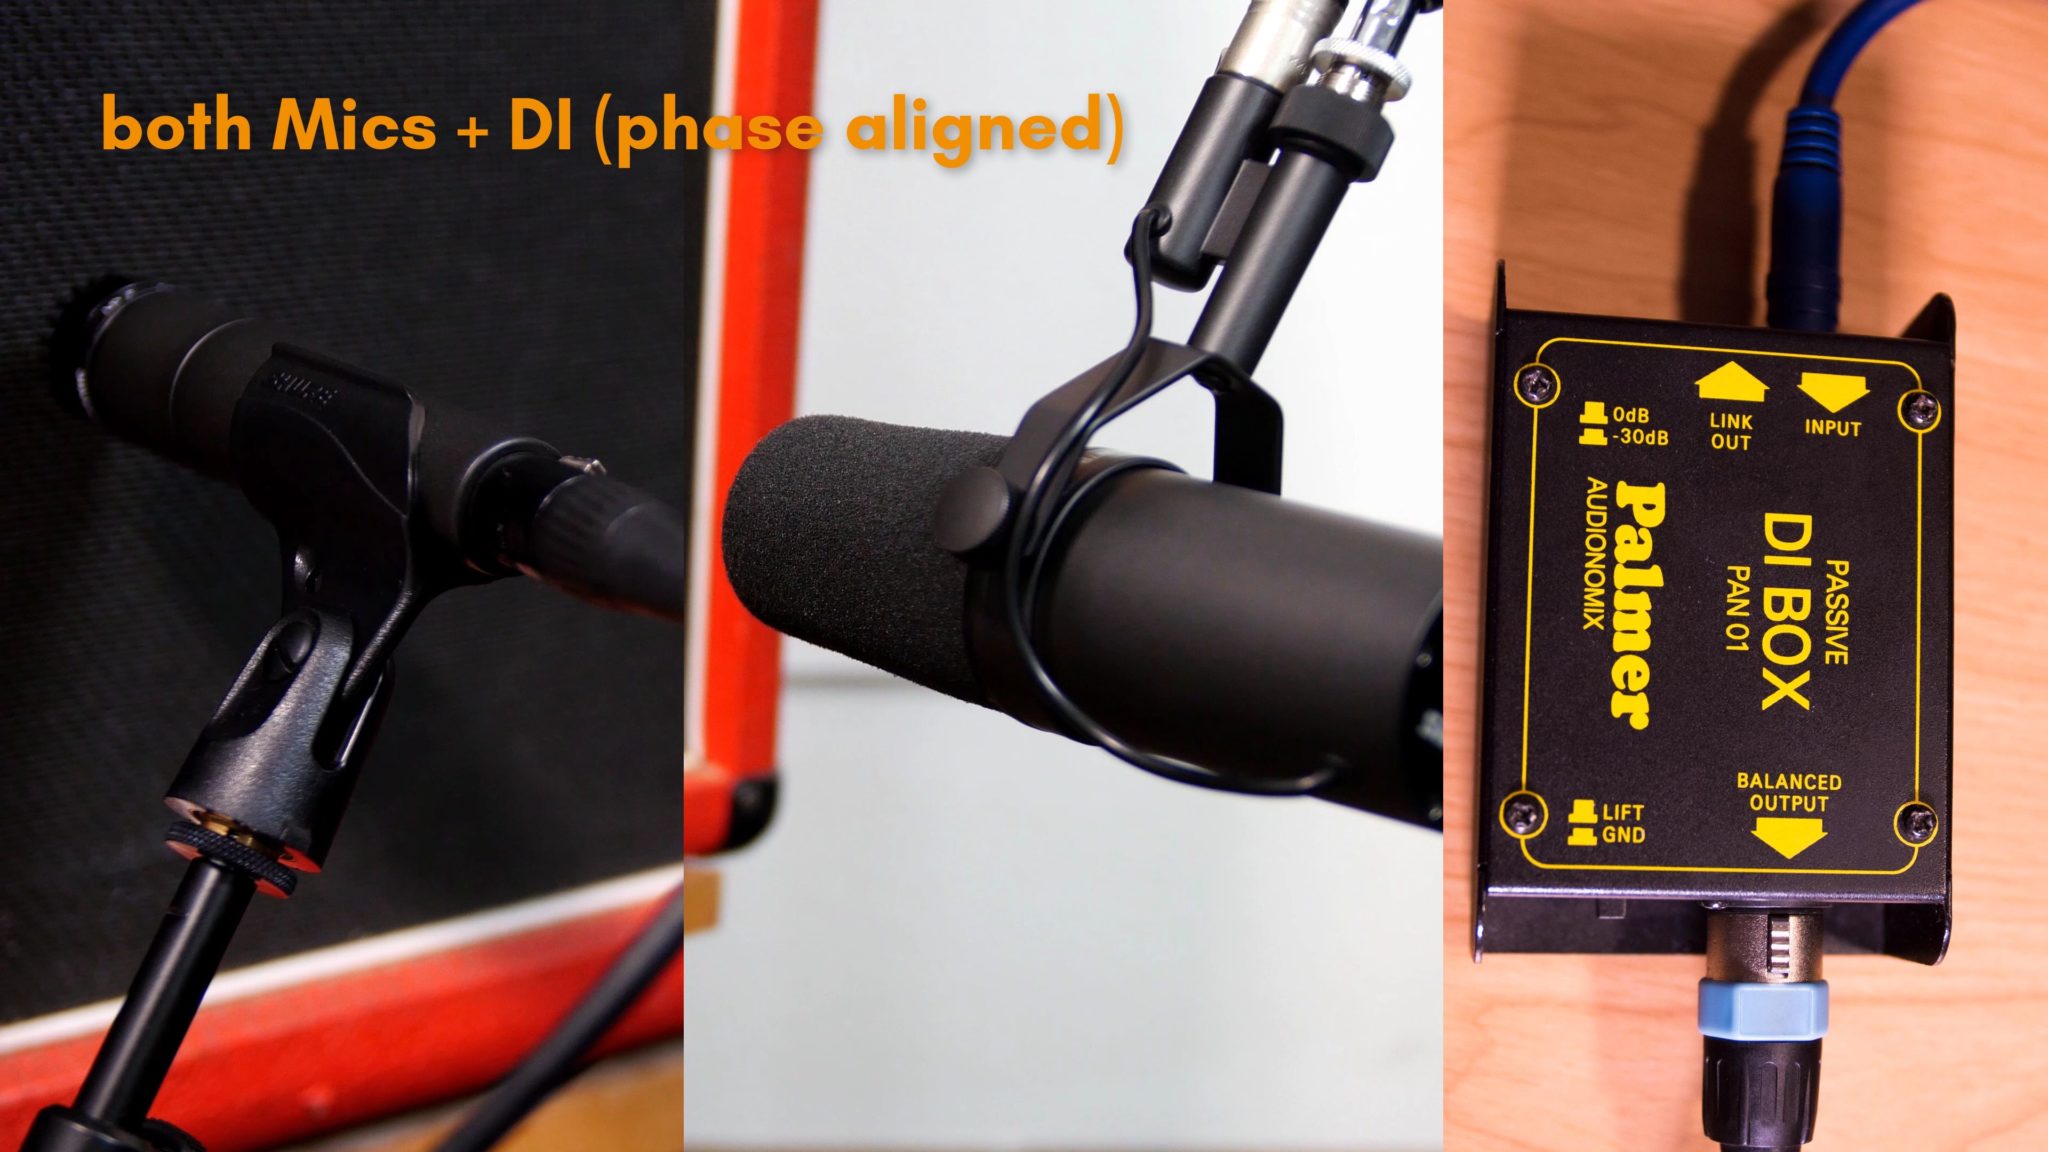
Rather than trying to fix issues during the mixing process, aim to blend them effectively. By combining different microphones with the DI signal, you can maintain the transients for a tighter attack. This approach, as demonstrated in the funk guitar part of the video, allows you to achieve just the right balance and ‘twang’ in your mix.
Giving it a little more room
Sometimes when I’m recording electric guitar (especially clean guitars), I also use a room mic with some meters distance to get the natural reverb of the room captured. Of course you can also use a reverb plugin for that. But if I have a good natural room, why use a artificial one?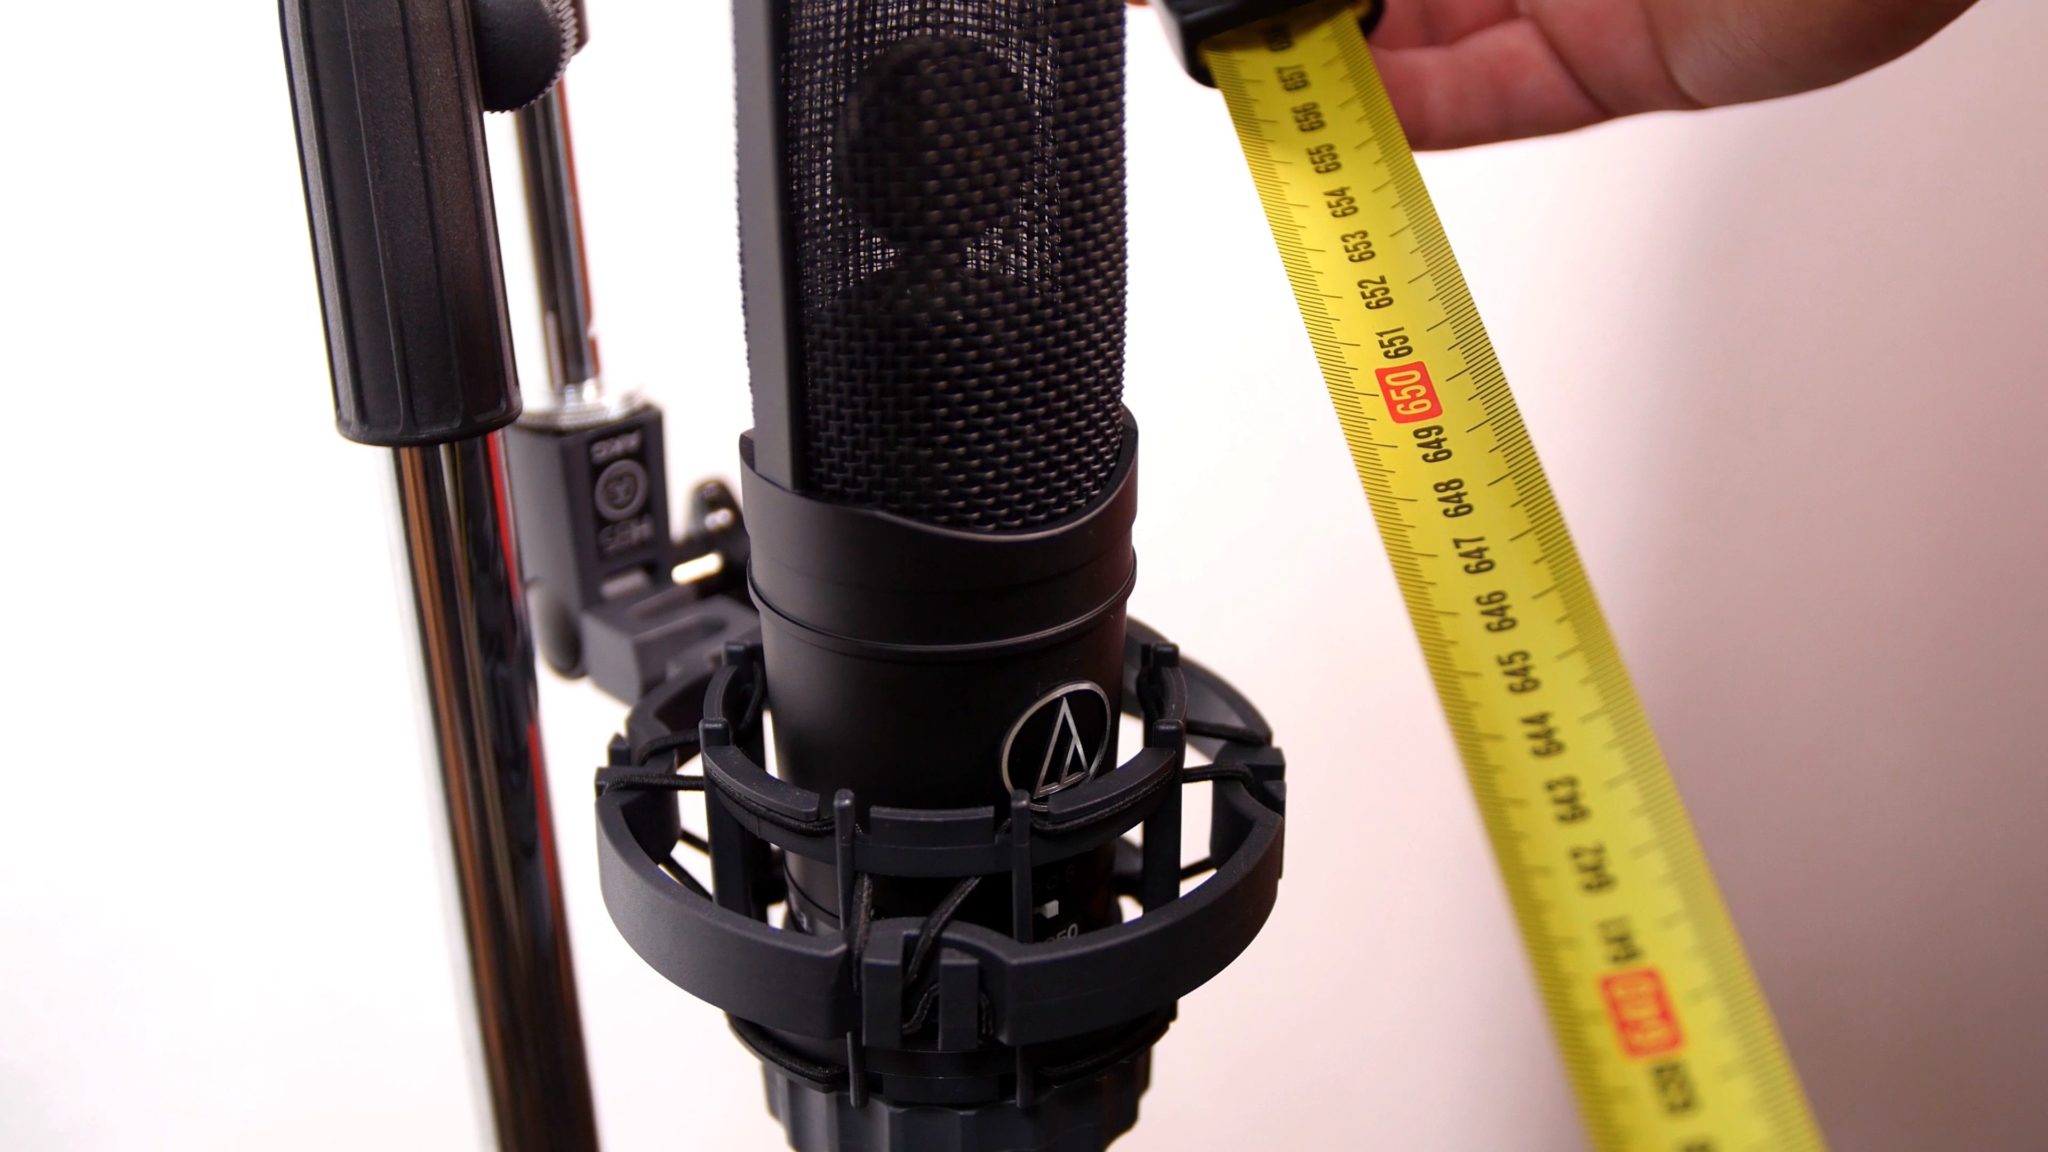
The AT4050 is a balanced mic, which is also really great for close miking a guitar cabinet. In this case it’s used as a room mic with 6,5 meter distance to the cab.
Wrapping it up
I hope you found this tutorial helpful. My goal was to give you an overview on what’s important when recording electric guitars with real mics. Of course, there is much more I want to talk about and this article only covers some basics. So be sure to subscribe to our newsletter to always stay informed. Also, if you want to dig deeper on mic placement I recommend this article from Roger Montejano: Where to shoot at the cone?Make a difference!